Showing posts with label crafts. Show all posts

Friday, November 11, 2016

United Tapes Set Of Washi Tape

One of my favorite things to do is make cards for all kinds of occasions. I use many forms of art to make them including using washi tape.


United Tapes has a really nice set of 12 rolls of Washi Tape to help with all kinds of crafts. Here's the really cool thing about washi tape, you can put it on things and then take it off later without leaving a residue behind. This is perfect for use in kids rooms to let them express themselves on their walls with their own designs. As they grow up, the designs can be changed easily.


It's also perfect for the crafter who wants to get things just so. You can place the tape and move it if it isn't exactly where you want it. Plus it is versatile for so many kinds of crafts from paper to painted items. The tape is flexible so it gives and moves much more easily than other kinds of tapes.
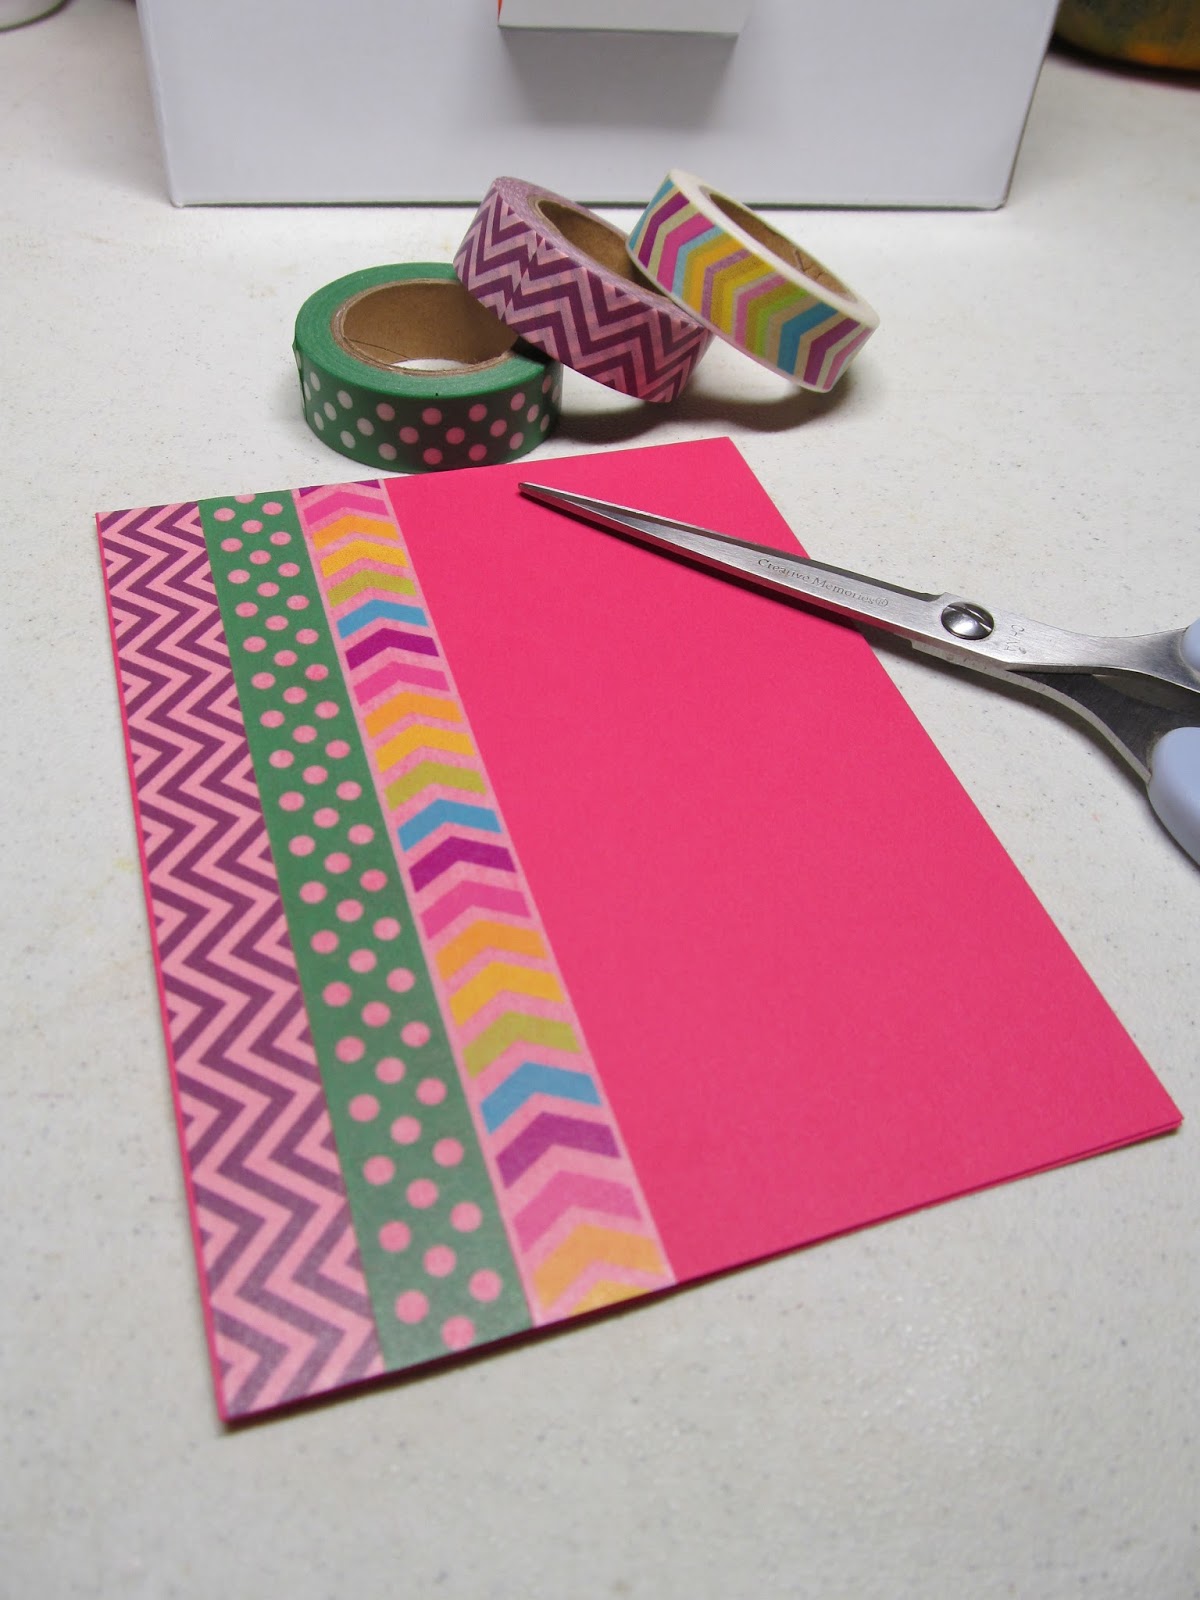

I love that it is light weight. Unlike adding layers and layers of paper to a card, you have light weight tape that adds color, pattern and dimension without adding a lot to the cost to mail a card. I also like the variety of colors and patterns in their set of washi tape. They work so well with a nice variety of projects and are a colorful addition to them.


This is a fun set of washi tape I can recommend to you!

You can purchase United Tapes 12 Roll Washi Tape Set HERE!


This reviewer received the product free or at a discounted price in order to bring you an honest review. No other form of compensation was given. All opinions are those of the reviewer.

Saturday, November 5, 2016

Marigold Thermal Laminator Giveaway

*This post may contain affiliate links.

Marigold 9

This Marigold 9" Thermal Laminator is designed in USA with NTC technology. It has the reliable function of temperature adjustment and cold lamination.


Laminator In Use

This unit can be used with a variety of pouch sizes, up to 9" wide and with its quick five minute warm up time you are laminating in no time. Thanks to three separate temperature settings: cold, three mil, and five mil all your projects are professional looking.


A great gift idea for the DIY enthusiast, crafter, and family record keeper on your gift list. See the complete review of this 2016 Ultimate Holiday Gift Guide Item HERE.


​Now, thanks to this great sponsor, three lucky readers have a chance to enjoy using this thermal laminator for their craft projects, photographs, documents, notices, ID cards, recipes, reusable menus, DIY luggage tags, and much more for free. Just enter on the widget below.

3 Will #Win a Marigold Thermal Laminator When This #Giveaway Ends on Nov 27th

Welcome to the

Marigold Thermal Laminator

GIVEAWAY

Hosted By

PaulaMS' Giveaways, Reviews, & Freebies

Co-Hosted By

The Worthier Part

IMHO Views, Reviews, and Giveaways

Deliciously Savvy

Sponsored By


Marigold

Giveaway Dates
November 4, 2016 at 12:01 am EST through November 27, 2016 at 11:59 pm EST


Giveaway Prize
Three lucky readers will win a
Marigold 9" Pouch Thermal 2-Roller Laminating Machine
I would like to give a big shout out to all the blogs participating in this giveaway! I couldn't do it without you. Thank you for bringing this promotion to your readers.
Thank You

​By following us on our social networks and by email we are able to get the best giveaways together on the internet! Please take a minute to follow us!


Thanks!


Chances of winning depend on entries received.
Open to US residents 18 years and older

Winning entry will be verified

GOOD LUCK!!!!!

Liking us on Facebook
helps us keep giveaways like this coming to you!
a Rafflecopter giveaway
Can't Wait For The Giveaway To End?
Get Your's Here!


LOVE GIVEAWAYS?
We have some wonderful bloggers posting giveaways on the dazzling giveaway link up!
Enter as many as you choose!

VISIT THE DAILY DAZZLE LINKY HERE

Add your giveaway and get it shared on 11 blogs.

Disclaimer: PaulaMS' Giveaways, Reviews, and Freebies nor any blog promoting this giveaway, is not responsible for the awarding of the prize. Sponsors are responsible for prize fulfillment. Any Questions about this giveaway? Email Paula At paula_stewart (at) ymail (dot) com.

Disclosure of Material Connection: PaulaMS has received the product mentioned above for free to facilitate the writing of this review. *Some of the links on this blog post are affiliate links. This means if you click on the link and purchase the item, I may receive an affiliate commission. Regardless, she only recommends products or services that she uses personally and believes will add value to readers. I am disclosing this in accordance with the Federal Trade Commission’s 16 CFR, Part 255: Guides Concerning the Use of Endorsements and Testimonials in Advertising.

Monday, September 12, 2016

Quick and Simple Craft With Funny Craft Washi Tape

Wahsi!!! Please tell me you know what it is.

No, well let me tell you.

Washi is a fun kind of tape that you use to decorate, well pretty much everything. You use it like you would ribbon, but instead of gluing it down or sewing it on, you simply tape it down. Because it's tape! But here is the cool thing....it's re-positionable. If you don't get it in the right place the first time, you can take it off and do it again. Not many craft items are that forgiving. You can also write on it with a marker or Sharpie.


Washi Tape sticks to pretty much everything and since you can move it around, you can really be creative by moving the tape to get just the right look or angle. It's really super thin too, so you can see the pattern of another Wahsi Tape behind the one in the front. You can create your own kind of pattern doing that. It's so easy to place and edge frames, book pages, decorate lockers, lamp shades and more. You are really only limited by your imagination, oh and the ideas of all of those thousands of other people on the internet who have played with it. LOL!

Funny Craft has some wonderful and fun Washi Tape available. I absolutely love all the vibrant colors and designs on their Washi Tape. The set of Washi Tape comes with 12 rolls, each with a different pattern. I had a lot of fun playing with them and thought I would show you one really quick project I did for a friend.


I used an old envelope that a bill came in and cut off the corner. I measured up on each side 1½" and then cut the whole corner off.


After cutting the corner off, it's just a mater of placing on different strips of Washi to decorate it on both sides. After putting on the tape, trim of the excess on each side. Repeat with the same pattern or a different one on the back.


So what is this simple little craft.....a bookmark! That's it. A simple little gift that can be made in a matter of minutes that is cute and marks your page in your book.


I even made several that I cut a little larger, measuring up 2" on each side of the envelope.


The Funny Craft Washi Tape is a lot of fun. I love the patterns, some are metallic, and they look great on cards, in scrapbooks and more. Great for using with your kids too!

You can purchase the Funny Craft Washi Tape HERE!

This reviewer received the product free or at a discounted price in order to bring you an honest review. No other form of compensation was given. All opinions are those of the reviewer.

Wednesday, July 13, 2016

Best new Craft Tool I Have ~ Huion Light Pad

Crafting is something I have been adamant about for years. I'm what you call a dabbler, meaning I will try all kinds of new crafts. But the kinds of crafts I come back to the most involve paper, all kinds of paper! But let's face it, when you are into crafts, you can accumulate a lot of stuff, all kinds of "things" to help you with the crafts you work in.


That's why I love this new product, because it is a HUGE space saver for me. It's the Huion 17.7" (Diagonal Length) 5mm Ultra Thin LED Drawing Light Pad! This is the best light box I have owned and it works beautifully.


The first thing I noticed about the light box is how nice it is in size. I can work with slightly larger project without having to move the paper a lot and re-positioning things. The next thing is how wonderfully bright the LED light is. There are multiple levels to set it at depending on what you are working on. If you hold your finger on the button the light slowly gets brighter. So hold your finger on a short while and the light is not as bright. Longer, brighter. Tap it once, the light goes to the brightest level. Tap it again and it goes off. Super easy to operate and get the level you want!


The next thing I love is how thin it is. It's only 5mm thick, that's 1/8" thick. It's a major space savor. LOVE that! It also can be connected to your computer or your smart phone with the micro USB cable included. I have attached mine to an adapter for my electrical outlet and I take it around the house to whatever project I am working on. So handy!


I love that it has LED lights, which means it will last for years and years. Plus it will not cost a lot to operate like a standard bulb light box does. Also it does not get hot. Old bulb light boxes would get hot, sometimes very hot.

From the day I got this in the mail I have used it. It has been really nice to have and so much fun! I highly recommend it to you.

You can purchase the Huion 17.7" (Diagonal Length) 5mm Ultra Thin LED Drawing Light Pad HERE!

This reviewer received the product free or at a discounted price in order to bring you an honest review. No other form of compensation was given. All opinions are those of the reviewer.

Monday, October 27, 2014

Names Of Christ Christmas Tree!


I don't share posts from other bloggers too often, but every now and then I come across something I really want to make sure you see. 

This is a project I am going to do for Christmas this year (and hopefully share with you). it is so simple, yet makes a big impact!

You can find out all about this by going HERE or clicking the image above. It's from Snippets and Pretties! You can download the words from her blog for this project! And she has lots of other lovely ideas there too!!

Monday, November 11, 2013

Emergency Candle Jar Gift

Growing up most of my childhood just south of Buffalo, NY I learned early that you can never be too sure that your electricity will stay on all the time. I remember long stretches of days when it was out. So when I found this idea I loved it right away!!

It simply is one of the easiest, quickest and most practical gift and craft I have found. I don't know a single person who could not use some emergency lighting to be available all the time. I have made these for my whole family and they have come in handy several times!
The items you need to make it are readily available all year long, so you don't have to wait for a particular season to get some of these made.
 You need the following:

  • emergency candles (I found mine at Dollar Tree)
  • quart canning jar, ring and lid
  • small box of matches
  • paper tag
  • decorative paper
  • 1/4" ribbon
  • marker
  • stamping ink
  • sponge
  • E6000 adhesive
  • 5/8" Flare Cap (plumbing department)
  • decorative paper
  • Tacky Glue
To start trace the canning lid on the decorative paper. Cut out the circle inside the line you just traced about 1/8th of an inch. You can adjust so it just fits inside the top of the lid. Once you have made one you can use it for a template to make more. I tend to make these by the dozen since that is how many jars come in a box when I buy them. Glue the paper to the top of the lid using Tacky Glue. Set aside to dry.

Write the words :Emergency Candles" on the paper tag using your marker. I used a dark brown marker because of the cream colored tag. Using a sponge, dab it in the stamping ink and smudge the edges of the tag to outline the tag. You could also use your marker to just frame it instead of doing the smudged edge too.

Insert a length or ribbon through the tag hole and tie the tag to the jar top rim. I knotted mine to ensure that it didn't come untied.

Fill the jar with 4 candles. I found that if you try to put many more in the jar does not shut well and then there is not room for the "candle cup" inside or the matches. Place a pack of matches in the jar too.

Your canning lid should be dry by now and you can attach your "candle cup" now. Dab a small amount of the E6000 adhesive on the bottom of the flare cup. Attach it to the bottom of the canning lid (the side that would normally be inside the jar when sealed). Hold it for just a bit to ensure it stays put and then allow it to dry overnight.

I've attached a picture of what the E6000 looks like in the store when you buy it since this is an adhesive that many don't use very often. It will hold almost anything to anything else! I love the stuff!!


Once your "candle cup" is dry you can place the lid on the jar with the cup inside while you store the jar. For use just flip the lid over and attach to the top of the jar with the ring. You not only have candles ready to go for an emergency, you also have the candle holder ready too!! 

When I give this as a gift I also include an extra box of the candles since they are so inexpensive at the Dollar Store. There are 10 in a box and they carry them all the time (at least at the time of this writing).

It may not be the most elaborate gift or craft, but it sure is practical! 
    

Wednesday, November 6, 2013

A Blast From The Past

This week I thought it would be fun to share a blast from the past.

A few months ago we moved, and in the process I discovered a lot of old treasures and special things I had forgotten about or hadn't seen in a long time. I thought it would be fun to show you one of those treasures I found buried in a box.

Way back in the dark ages (1976) when I was in high school I was minoring in art. I loved being able to try out different mediums and finding the things that I was good at and that fit me. For one of my finals I had to do something in fabric. I remember our art teacher didn't care what it was or what kind of fabric item we made, but it did have to reflect us and show a real effort and creativity. It didn't take me long to figure out what to make. I love to sew and I love embroidery, so I combined the two into a wall hanging.
This is my dragon! I designed the image by looking at tons of pictures of all kinds of dragons and then drawing my own version. I drew the dragon on a large piece of denim and then started embroidering it. I really don't remember how long it took me, but I do remember my Mom and Dad asking me over and over "are you still working on that thing?" There are over 100 scales and then all the work on his tail and face. I used about 5 different stitches on it and loved making it the whole way through! The finished piece is 36 x 28! I had forgotten how big it was.

These are pictures of me finishing up the dragon. They are old, old Polaroids, in fact the one is all cracked from age. The top picture is me working on the last scale. The bottom one is my doing the last embroidery stitch. 

When he was done I backed the piece with muslin and made a pocket at the top so I could hang him up. My parents loved the finished piece. It hung in the school for about a month and then I brought it home with an A+. My art teacher loved it. He hung in my room until I graduated from high school and then he hung in every one of my college dorm rooms. I may just have to hang him up for a while in my craft room just for fun.

Photos copyrighted by Lois Jones